Nikon D7500 is it worth the upgrade?

Hi, I hope you are well and had a fantastic weekend.

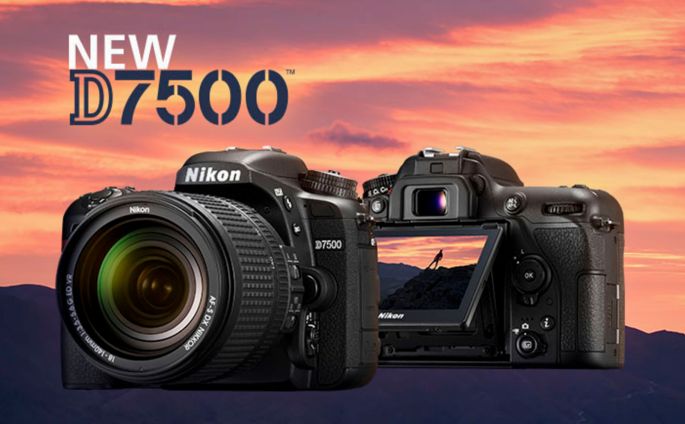
For those, like me that like to know everything about new gadgets and new cameras, you may know that last week Nikon announced the new D7500.
In paper it sounds great, but is it worth it?

Since I moved to DSLR system cameras, I have been shooting with Nikon, so it makes sense to me to share my opinion about the new D7500.
For those who don’t know I am a photographer that photographs mostly events and ceremonies, so fast glass is a must, but what about cameras?What do I look for in a camera?

My main camera is a Nikon d800 and not only is fantastic at high ISO, but overall it performs really well.My second body at the moment is the Nikon D7100 and I love it too, so in paper it would make sense for me to upgrade, but will I upgrade?
The anwser is NO! I will tell you why.

As I mentioned above, I need cameras that will perform well under all light conditions and the D800 does the job, but while photographing an event or a ceremony, I always carry 2 bodies, in my case the D800 with a 24/70mm 2.8 and on my D7100 a 70/200mm 2.8. So even on the “crop sensor” camera it still needs to perform well, and to be honest, using fast glass  with my D7100, I am very pleased with the results.

The new D7500 sounds amazing as the ISO can go up to over a million, but first, the results (based on her big brother D500) the quality is not all that at that high ISO and to be fair I’ve shot events where the only light sources were only candles, and I got all the shots I wanted/needed at just over 25000 ISO, so for that, in my opinion its not worth the upgrade just based on ISO.

Another great feature on the new D7500 is that it allows to shoot 50 Raw images in a single buffer at 8 fps, as the D7100 does 6fps and 7fps at “crop mode” for my main workflow, even that after 2 seconds the buffer is full, my D7100 still performs really well under normal conditions.

The future is here and the video resolution is getting better and better and on the D7500 you can shoot 4K video and to be honest I never tried 4K video on a Dslr, but as I don’t do video, even that is great to shoot at 4K, for me just upgrading so I can shoot 4K it just doens’t make any financial sense.

Another great improvement on the 7000 series is the tilt screen, specially if you shoot landscapes or above a crowd, even that personally I think its a great feature and it can be super helpful, in my opinion its not great for me.

With the revolution of Social Media, everyone takes a photo and wants to share with friends, family and followers, for that Nikon incorporated Snapbridge, so you can easily transfer the images to your mobile device, but as for me, I rather take some photos, get into my computer and add them to my Lightroom, syncronized with my phone, its just fantastic!

Now here is what I think that Nikon messed up big time, so even if I was thinking about upgrading to all those new cool features, this just put me off!
Well, If I am photographing a ceremony or an event I always shoot to 2 memory cards, so if for some reason one memory card fails, I have the other one.I only had once that a memory card failed on me, and funny enough, it was a brand new (cheap, but from a well know manufacturer) card that I bought to have more storage while on holidays that after 2 test shots it just failed. So, for my work shooting with 2 memory cards, it just makes sense.

By now, you already know that I am not going to upgrade, if there was 2 memory card slots, I think I would upgrade as the extra frames per second, could be cool to shoot some wildlife or even sports.

Overall veredict:

It may not make sense to me to upgrade, but if you are after a great camera to shoot wildlife and sports, having 8fps is a great feature to have without spending the money on a D500. Also, if you have a 3000 series camera and are looking to upgrade to a fantastic camera, the D7500 is the way to go, but you can also buy a 5000 series camera where you have the tilt screen and with just over 3 extra megapixels and with the money you save, buy some sharp glass.

By all means, I am not trying to put you off of making the purchase of the D7500!
Its a fantastic camera, well built and has many cool features, its just of matter, is it worth £1299.00?( Body only).

I hope this post helped you in either making the decision of buying or not the D7500.

Have a fantastic week!

Miguel

Still Life Tip and Trick

Hi,

I hope you had a fantastic weekend.

a few weeks ago I was having a chat with a friend about still life photography and he actually mentioned that he wanted to create an image where the glass would be half full, so the liquid would be on the top and the bottom half would look like it was empty.
Fair enough, in Photoshop is super easy to do, but he also mentioned that it would be cool to do the most as possible in camera…
Straight away I had an idea! Of course I didn’t tell him about what I had in mind as I wasn’t sure if it would work, but here it goes.
Many years ago I remember old people saying that olive oil was lighter than  water, and I remember that my grand mother used to use olive oil with candles… So I decided to have a go!
All I did was half fill the first half of the glass with water, then I grabed some olive oil and slowlly I was pouring to the same glass. Guess what, it was kind of working, so I decided to let it settle for half an hour or so.
And as you can see it worked!
The olive oil stayed above the water without mixing with it. So, as I had achieved what I was after I decided to create and image where I had an Empty Glass, another Half Empty and other Half Full.

I think that I might do another version of the image, but to be honest, it worked.

So, sometimes even if something may sound impossible, it is possible to create and this image is proof of it!
So, now that you know one of my tricks, experiment  and play! I am sure you will come up wit some great results.

I hope this post helps you and inspires you in any way!

Have a Fantastic Week
Half full

Still Life inspiration

Hi everyone, I hope you had a fantastic weekend.

As for me, even that I worked most of the weekend, I found some time to play a bit more with some still life.

This Blog post is intended to inspire you, and to show you with some creative composition, we can achive some cool images.

In this set of photos I used a camera on a tripod with my 105mm macro lens, a remote to trigger the camera, a softbox and a speedlight, so, nothing dificult or expensive, so everyone can create images like this.

The post processing was very easy and quick too, just cleaning up a bit and playing with the colours.

Here are a couple of images to hopefully inspire you


I will create a couple more images like this and will share the behind the scenes and also a nice and easy trick to achieve this images straight from camera.
Have a great week,

Miguel

Still Life simple setup

Hi, I hope you had a fantastic Weekend.

As for me, I have been playing a bit as you will see on this post…

Even that winter is coming to an end, its nice from time to time to stay indoors, but sometimes its the problem of what to photograph. So this weekend, I was playing with a very simple setup, a couple of glasses and after, I grabed a small bottle of Coke.

The setup was a 60cms by 60cms softbox with a Nikon Speedlight at 1/4 power at 17mm, sitting just behind a small table with a blass glass top, (great for reflections)and  a couple of black cardboard pieces


I had my camera with a 70-200mm on a tripod and had a remote to trigger the camera. The settings on the camera were 1/15 of second, f/11, ISO100 and the lens was at 150mm. As you also may see on the image above, I had the the 2 pieces of card board on both sides of the bottle, the reason for that is very simple, I wanted a white background, but also wanted the edges of the bottle to be darker, therefore have a definition and separation of the bottle from the background and the reason of such a slow shutter speed, is just to allow to have detail on the front of the bottle and the liquid.

Here is the final result


Now, lets change a bit the setup, lets get rid of one of the cards and put the remaining card behind the bottle…


As you can see, super easy!
So, lets check the camera settings. The shutter speed was increased to 1/150th of a second, so it will only capture any light from the speedlight, and in regards to settings, I didn’t change anything else.

And here is the result


As you can see, I got a black background with some hightlights on the edge to separate the bottle of the background and to enhance the shape of the bottle. It worked as I planned but I had no detail on the label as there was nothing lighting it, so I just grabed a tourch and iluminated the label 😁

As you can see with a small andcheap setup, you can achieve some cool images!

I sure hope that this post inspires you to try this out. I would love to see what you come up with, using this setup.
Have a great week,
Miguel 

Add a subject to your cityscape images

Hi everyone, I hope you had a great week.

Today I want to share with you something cool that happened to me during holidays season…

As you know I live in London and throught out the year, its a beautiful city, however during the holidays season, it becomes a lot more iluminated and beautiful, as I have a very soft spot for lights and night photography, Me and my wife and son went for a nice walk.

Of course, I was ready to capture some lights, but there was a particular image that for the first couple of seconds of shooting, I wasn’t very happy. I’ll explain!

There I was with my camera all setup on my trusty tripod, remote trigger in my hand ready to shoot until a gentleman stops in front of me playing with his phone. Well, even that I didn’t want him on my image, I started taking my set of bracketed images, so I could see if I had the right settings and if the composition was as I visualized.

All was good and he kept walking in front of me, then he stopped, maybe he was on Twitter    Talking about me, or just checking is Facebook feed, but as I saw him a bit still, I had the idea of including him on the image, so I started shooting and thinking to myself”please, don’t move”.

Well, he did move a bit but I got the sequence of brackets, and to be honest, as soon as I started processing the images, I realized that thanks to him, I had created a more compelling image.

So, here is my advice, if this happens to you, don’t give up, start taking some photos, even if someone is walking in front of you, it may help you create a rather more pleasing image 😉

I hope this post inspires you!

Have a fantastic Weekend,

Miguel

Portrait Tip-Bring Your Subject’s Smaller Eye Closer to you

Hi everyone!

I hope you had a fantastic week!

Today’s post is a short one, yet, in my opinion very helpfull.

If you are a portrait photographer, you most likely have noticed that a lot of people have one eye smaller that other, and when they smile, or try to smile it becomes even more obvious.

As any portrait photographer would know, always focus on the eyes, and focus on the eye closer to you.

So, if you bring the person’s “lazy” eye closer to you, it wont be as obvious that, that person has a smaller eye. Fair enough, we could fix the eye in Photoshop, but if you are shooting tethered or you show the back to the camera to your subject, it wont be as obvious, and it will make them feel a lot more confortable with themselves, as there are people that they don’t feel confortable with the “lazy eye”
I hope this short blog post is helpful for you! So now, go out and photograph someone and see for yourself the great results you can achieve.
Have a fantastic Weekend,
Miguel 

Wide angle vs Ultra Wide angle lens

Hi everyone, I hope you had a great week!

In todays post I would like to share, my thoughts about a question that I am asked a lot. What is the difference between ultra wide angle and wide angle lens and how they can be used?

Well, the easiest answer would be its the focal length, and to be fair, that is correct, but there is more to it.

In the example images bellow, I was using a Nikon crop sensor camera and the crop factor of it is 1.5X.

On this first image, I captured this image at 18mm, so on a full frame the equivalent of 27mm, that is the focal lenght that most of us start, including myself, its great for landscape, cityscape and even when you have all your family together, its wide enough to capture  everyone.


As you can see from this image, in terms of composition, it works really well, but when I shot this image a few years ago, I still thought that even that it was a cool composition, the image could be improved if I would go back to this location with better light (in my personal opinion), but also with a ultra wide angle lens.

You may think, why a ultra wide angle lens, if I already have the subject and some leading lines leading to the subject. And as you may see from the image bellow a lot changes.

6 or 7 months later I go back to this location, at a different time of the day, where I could even include the sun on my composition.

Those who know me, know that I shoot a lof of Bracketed images, so later I can process them in Hdr Pro using Photoshop, therefore I could shoot against the sun and still have a great overall exposure.I had my camera on my tripod, remote connected and a ultra wide angle lens a Sigma 10-20mm at 10mm, which is the 15mm equivalent on a full frame camera.


Now you can see the differences of shooting with a ultra wide angle lens… The part of the bridge closer becomes more exaggerated, therefore enhancing the foreground and the leading lines to the subject. Also, you can see that the subject looks like its further away, allowing me to capture a lot more of the river and reflections on it, not to mention that I still have plenty of sky on the image that allowed me to capture the sun in a perfect way.
I hope that this post helps you and if you are thinking of going ultra wide, I clarified any questions that you could have, but if you have any more questions,  feel free to contact me.
See you next time and have a Fantastic Weekend!
Miguel